Arduino Uno R4 WiFi Enrollment Tutorial
1. Overview
This tutorial covers how to enroll an Arduino Uno R4 WiFi with the RIoT Secure Platform. Once enrolled, the Arduino Uno R4 WiFi can be monitored and updated over-the-air from the Management Console.
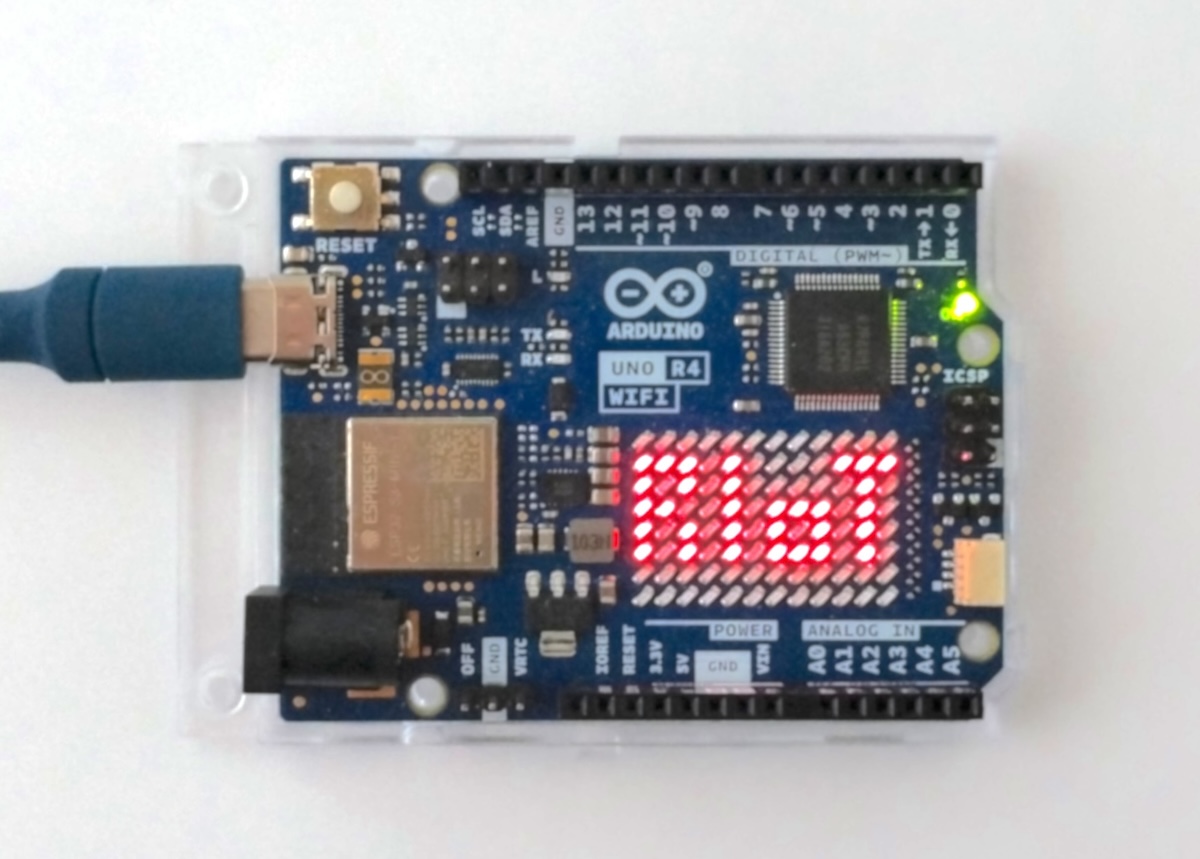
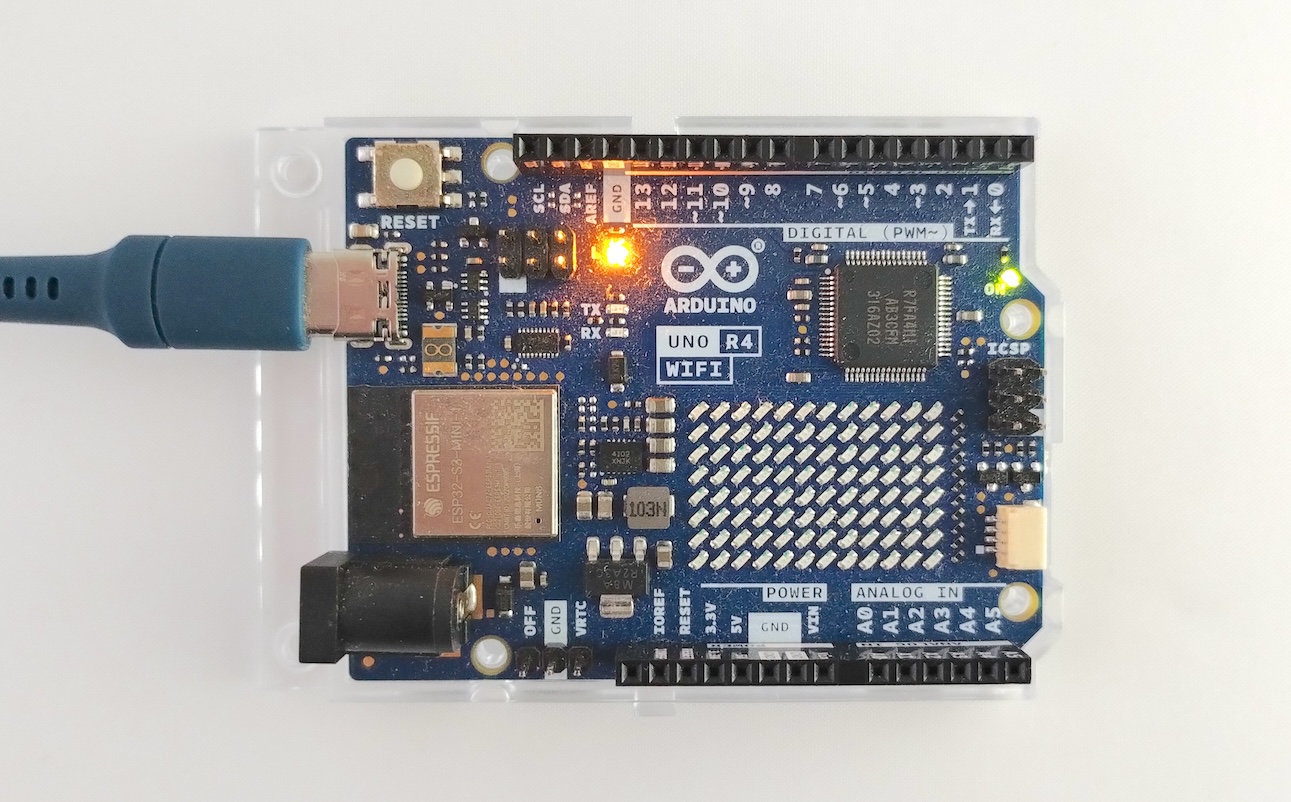
1.1. Arduino UNO R4 WiFi Hardware Architecture
The Arduino UNO R4 WiFi has two microcontrollers onboard, the Renesas RA4M1 and the ESP32-S3.
The ESP32 is used as a WiFi and USB bridge for the Renesas microcontroller. The Renesas is used to run application firmware, and the GPIO pins (including the LED matrix) are accessible from the Renesas only.
When enrolling the UNO R4 with the RIoT Secure Platform, the ESP32 is programmed with a new firmware – the RIoT Secure FUSION Core Firmware.
Once the ESP32 has been programmed with the FUSION firmware, the Renesas microcontroller on the UNO R4 cannot be programmed over USB – instead the application firmware is updated over-the-air.
The FUSION Core Firmware is flashed on the ESP32 microcontroller using esptool, a Python-based utility developed by Espressif Systems. How this is accomplished is detailed below.
1.2. How to Restore the ESP32 Factory Firmware
If the need to restore the original factory firmware of the ESP32 microcontroller should arise, this can be accomplished by using the espflash tool provided at the Arduino website.
Consult the following article for step-by-step instructions: support.arduino.cc/hc/en-us/articles/16379769332892-Restore-the-USB-connectivity-firmware-on-UNO-R4-WiFi-with-espflash
Note that restoring the firmware of the ESP32 microcontroller will render the device unoperational with the RIoT Secure Platform. If this is done, the device needs to be re-enrolled to be operational again.
1.3. Overview of Enrollment Steps
Enrolling a device is done by registering it with the RIoT Secure Platform and installing the FUSION Core Firmware on the device.
The following are the steps in the process of enrolling a device:
- Prepare the Device Hardware. Configure the device as instructed below. Make sure all cables needed are available (USB-C cable and female-to-female jumper wire).
- Create a Device Entry in the Management Console. Create a new device entry in the Management Console and configure it with the name and password of the network the device should connect to.
- Download the RIoTInstaller Bundle. Download the Core Firmware for the device from the Management Console.
- Install the Core Firmware. Run esptool in a terminal window to flash the firmware to the device.
- Core Firmware installation. Once the Core Firmware has been installed, the device will reboot and connect over the network to the OASIS Cloud and complete the enrollment over-the-air. This process may take around 3-5 minutes. The progress of the installation process can be watched in the Serial Monitor in the Arduino IDE.
- Verify device status. When the enrollment process has finished, the device is listed as “Enrolled” in the Management Console.
- Upload Application Firmware. The device is now ready to be updated with application firmware, which is uploaded over-the-air using the Management Console.
2. Prerequisites
2.1. Required Knowledge
To walk through this tutorial, familiarity with the RIoT Secure Platform, the Management Console and the appropriate tools to compile and export firmware is required.
Requried knowledge:
- Familiarity with the RIoT Secure Platform
- How to use the Management Console
- How to setup and use the Arduino IDE
- How to create application firmware sketches in the Arduino IDE
- How to export firmware sketches from Arduino IDE
- Basic knowledge of the Core Firmware log
2.2. Required Components
The following items are needed:
- An Arduino Uno R4 WiFi.
- A USB cable to connect the Arduino Uno R4 WiFi to the computer.
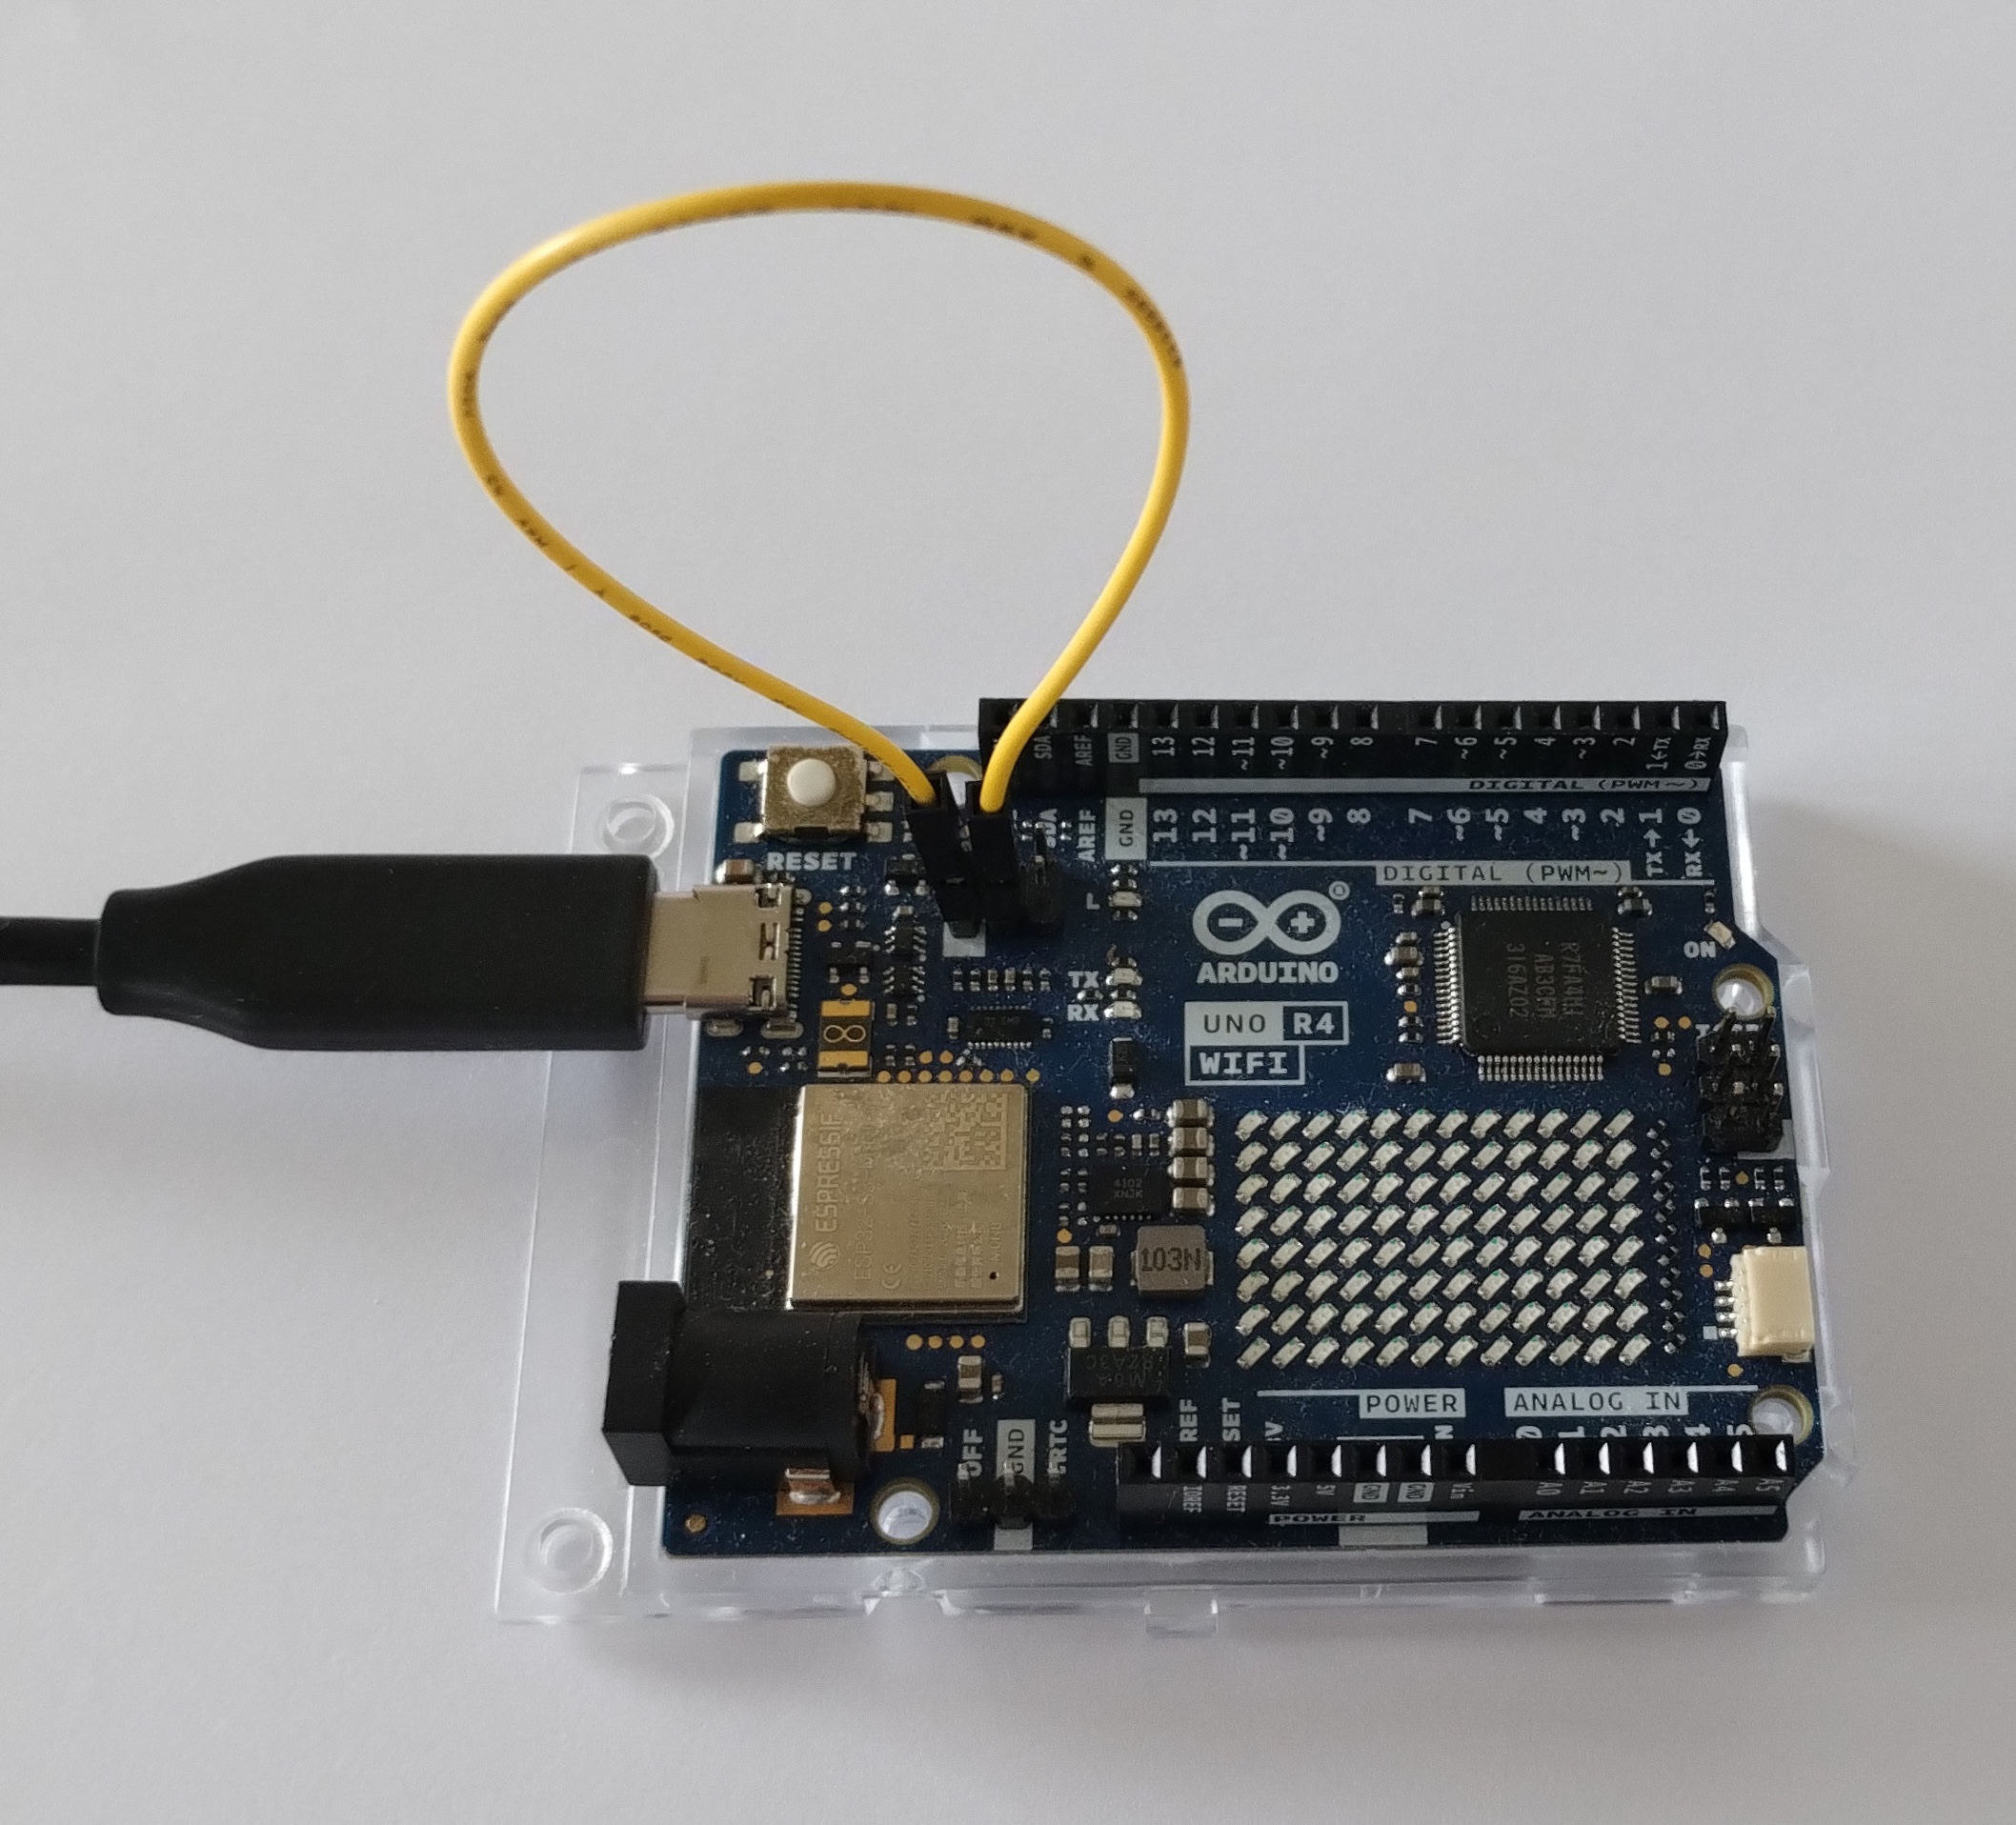
- A female-to-female jumper wire for connecting the GND and DOWNLOAD pins on the Arduino Uno R4 WiFi to enable programming of the WiFi module. This is required for flashing the FUSION Core Firmware to the device.
Required software components:
- The Arduino IDE version 2.3.2 or later is needed to build application firmwares.
- Python should be installed. Python is required to run Esptool to flash the Core Firmware.
- An account for logging in to the Management Console.
- Information about the network connection that will be used: WiFi name (SSID) and password.
- On Linux, make sure the Linux USB subsystem is properly configured. See the Linux USB Configuration guide.
Firmware OTA requirements:
- When the device has been enrolled, the application firmware can be updated over-the-air. For this step an application sketch exported to hex format is needed. Learn more about OTA updates in Section 8 below.
2.3. Configure ESP32 Download Mode
In this preparatory step, the Arduino Uno R4 WiFi is configured to allow programming of the ESP32 firmware.
In order to flash custom firmware to the ESP32-S3 we need to put the chip in download mode by shorting the DOWNLOAD pin and GND pin using a jumper wire. These pins can be found on the 3x2 header at the top of the board.
Note that shorting these pins is only needed the first time the FUSION Core Firmware is flashed to the device. When re-flashing the core firmware of a device that is already enrolled, shorting the pins is not needed. (It is the Arduino Uno R4 factory firmware that requires shorting the pins to overwrite the ESP32 firmware.)
Also see instructions on the Arduino web site.

2.4. Install Python
Python 3 is required for to run Esptool. (Esptool is used to do the initial flashing of the Core Firmware. Subsequent updates of the Core Firmware are done over-the-air.)
Below are short guides for how to install Python. For further information, visit www.python.org
2.4.1. Windows
Download the Python installer from www.python.org and follow the instructions on the Python web site. The Windows installer installs both python3 and pip3.
2.4.2. macOS (using the brew package manager)
On macOS the brew package manager is recommended for installing Python. Visit brew.sh for instructions on how to install brew.
Once brew is installed, install Python as follows (will install Python 3):
brew update
brew install python
brew install pipx
To upgrade Python use:
brew update
brew upgrade python
brew upgrade pipx
Verify installation:
python3 --version
2.4.3. Linux
On Linux Python 3 should already be installed. To verify that you have a working version, use the following command (displays the version number):
python3 --version
If Python is missing, install it using the apt package manager (some Linux platforms use other package managers):
sudo apt update
sudo apt install python3
sudo apt install python3-pip
If Python is installed but needs to be upgraded, use the following commands:
sudo apt update
sudo apt upgrade python3
sudo apt upgrade python3-pip
2.5. Install Esptool
To flash the FUSION Core Firmware, the Espressif Esptool software is used. Install Esptool by following the steps outlined below.
For troubleshhoting and further details, see the Espressif Esptool installation instructions.
Note: Python 3.7 or newer is required to install and use Esptool.
2.5.1. Windows
Open a terminal window and run the following command (pip3 is the Python 3 module installer):
pip3 install esptool
Check that esptool is in the list of installed Python modules:
pip3 list
2.5.2. macOS
When Python is installed using the brew package manager (recommended), use the pipx command:
pipx install esptool
Check that esptool is in the list of installed Python modules:
pipx list
2.5.3. Linux
Open a terminal window and run the following command (pip3 is the Python 3 module installer):
pip3 install esptool
Check that esptool is in the list of installed Python modules:
pip3 list
Configure Linux USB
On Linux systems, you need to add your user to the dialout group to grant full access to serial USB ports. Open a terminal and enter the following command:
sudo usermod -a -G dialout $USER
Then restart your computer to make changes take effect.
For further instructions, see the Linux USB Configuration guide.
2.5.3. Verify installation
Confirm that esptool is properly installed by running the esptool version command, which will display the esptool version.
There are two ways to invoke esptool from the command line.
The first is:
esptool.py version
If the above does not work, try the second way:
python3 -m esptool version
To display a list of all available commands and command line options, use the help option:
esptool.py -h
If the above does not work, try:
python3 -m esptool -h
How to use esptool to flash the Core Firmware is descibed in a subsequent section of this document.
3. Create a Device Entry
Use the Management Console to create a new device entry for the device that will be enrolled with the RIoT Secure Platform.
3.1. Login to the Management Console
Login to the Management Console using a valid username and password.
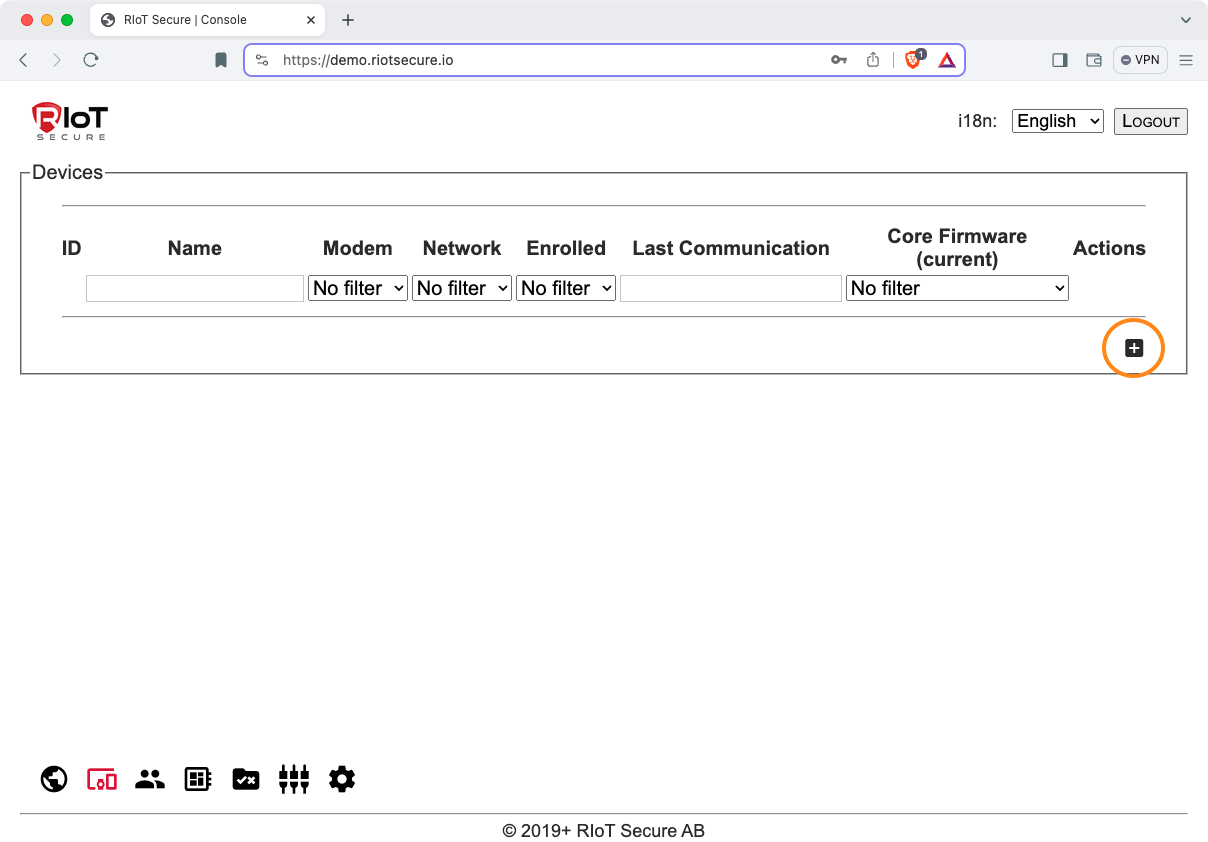
3.2. Add a New Device Entry
Navigate to the Devices Screen and click the “+” icon to add a new device:
3.3. Fill in the Device Fields
Fill in the fields for the device, as illustrated by the screenshot. For a reference to the device fields, consult the Management Console Documentation.
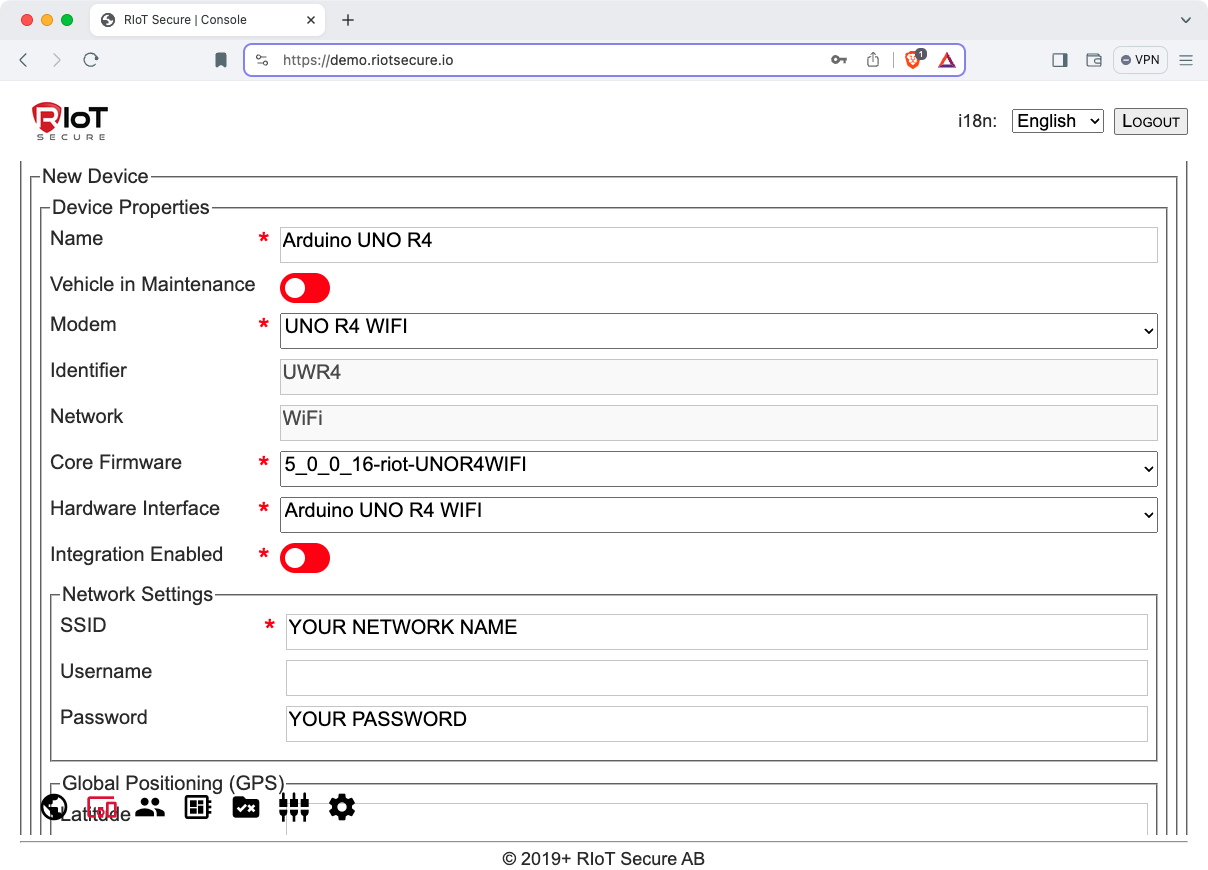
Optionally, a static GPS location can defined. Not all devices will have a GPS tracker; however, this does not mean that the device cannot be shown on the map.
Simply fill in the Latitude and Longitude fields to specify a static location. If at any point a GPS tracker is added to the board, the platform will automatically use the dynamic device location data.
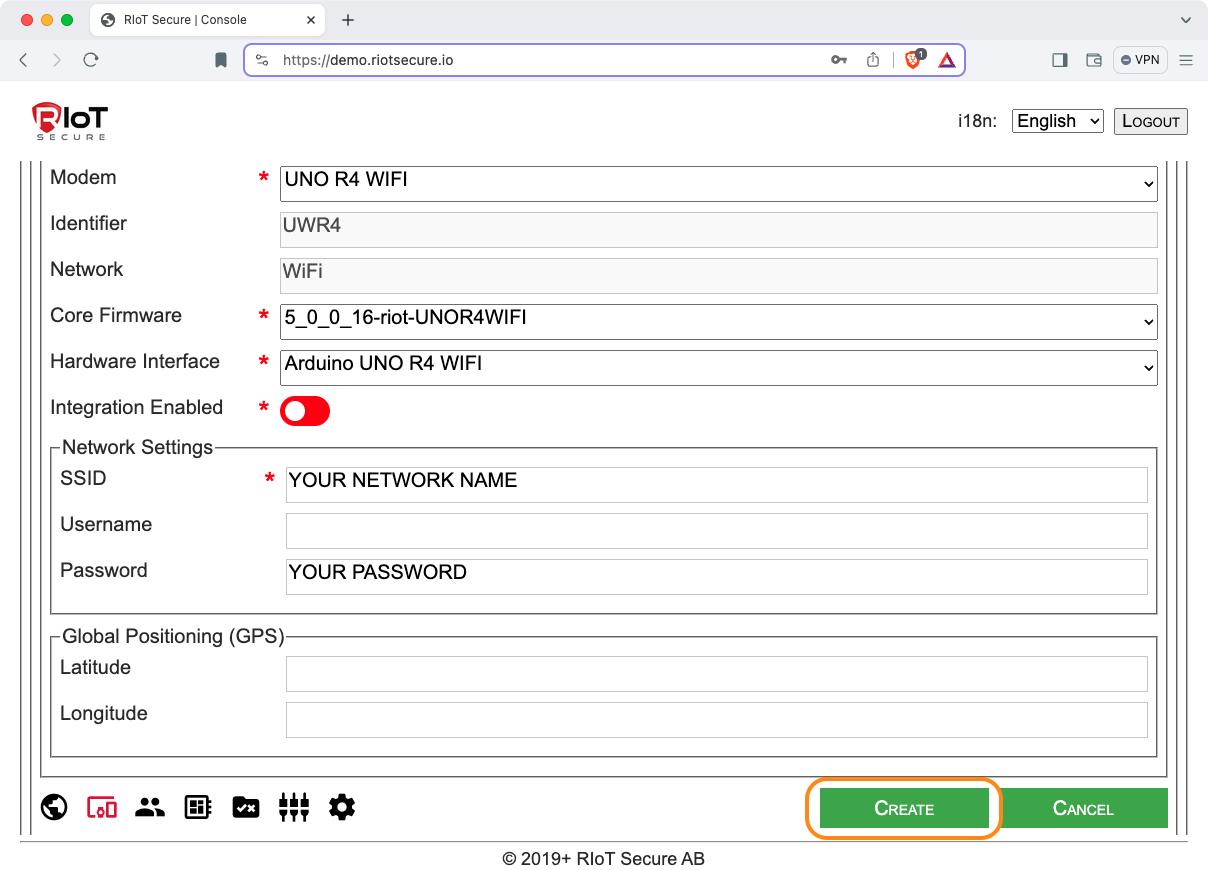
3.4. Create the Device
When all required fields are filled in, create the device by clicking on the CREATE button at the bottom of the page.
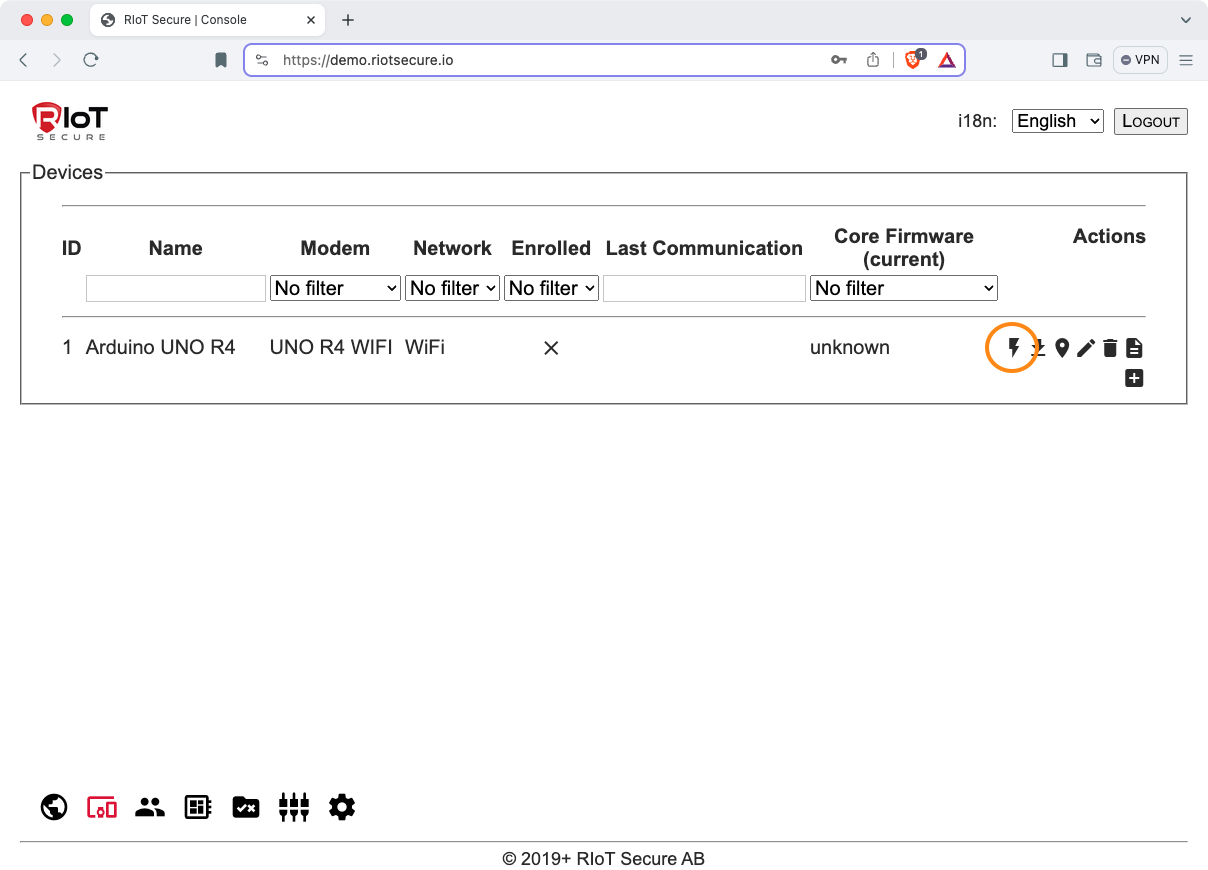
The device is now shown in the list on the Devices Screen.
4. Download FUSION Core Firmware
When the device entry has been created in the Management Console, the next step is to download an the FUSION Core Firmware for the device.
4.1. Download File Bundle
Go to the Devices Screen in the Management Console. Click the small “flash” icon to the right of the newly created device entry. This will open a dialog box prompting to save a zip file that contains the file bundle for the device.
The downloaded zip file will be named:
RIoTInstaller_{device_id}.zip
4.2. Unzip the RIoTInstaller file
The downloaded zip file contains a Python script that is used to flash the FUSION Core Firmware to the ESP32 microcontroller.
Note that the name of the zip file contains the device id.
For example, the installer zip file for the device with id 1 is named:
RIoTInstaller_1.zip
Unzipping this file will create a folder that contains the Core Firmware specific to the device with id 1.
The unzipped folder has the following content:
RIoTInstaller_1
  ESP32s3-RIoTClient.bin
  README.TXT
The ESP32s3-RIoTClient.bin file is the firmware that is flashed to the device in the next step.
Note that the Core Firmware file is specific to the device with the given id, even though the device id is not present in the file name. Make sure to check the id of the containing folder before installing.
Double-check that the id of the id of the folder is the desired device id - it will be permanently associated with the physical device (changing the device id requires reflashing the device).
5. Flash FUSION Core Firmware
This section describes how to flash the FUSION Core Firmware to the Arduino Uno R4.
Make sure that the WiFi network specified in the Management Console when the device was created is available, before flashing the Core Firmware.
The following is an overview of the steps related to flashing the Core Firmware to enroll the device. Each step is described in additional detail below.
- Close the Arduino IDE, if it is open
- Disconnect the device (power off)
- Short pins using a jumper wire as descibed above
- Connect the device (power on)
- If a window with a USB device security promt is displayed, click allow to permit the device to connect
- Wait a little and the remove jumper wire
- Find device port name
- Erase flash memory (using esptool)
- Write core firmware to flash memory (using esptool)
- When the core firmware has been flashed, the device will restart automatically and connect to the network (WiFi must be available for enrollment to work)
- To view the enrollment log, open the Arduino IDE, select board and port, and open the Serial Monitor (check that the selected baud rate is 115200)
- Wait for enrollment to complete (takes around 3-5 minutes)
- Check device status in the Management Console
5.1. Close the Arduino IDE
Programs that connect to the device over USB must be closed, or Esptool will generate an error that they are in use.
5.2. Prepare the Device
- Unplug the device (power off)
- Short the pins as described above using a jumper wire
- Connect the device over USB (power on)
- Wait a litte and remove the jumper wire
5.3. Find the Port of the Device
The name of the USB port for the device is needed to flash the firmware. It is given as a parameter to esptool.
Connect the Uno R4 to the computer using a USB cable, and use one of the methods listed below to find the name of the USB port for the device.
5.2.1. Windows
Check in the device manager under Universal Serial Bus devices.
5.2.2. Linux
Open a terminal window and list the connected devices using the following command:
lsusb
5.2.3. macOS
Open a terminal window and list the names of connected devices using the following command:
ls /dev/tty.*
Example:
% ls /dev/tty.*
/dev/tty.usbmodem11101  /dev/tty.wlan-debug
In the above example, the name of the Uno R4 USB port is:
/dev/tty.usbmodem11101
5.4. Flash the FUSION Core Firmware
In the terminal window, go to the directory that contains the firmware file for the device. For example:
cd RIoTInstaller_1
Erase the flash memory of the ESP32 using the following command (replace PORT_NAME with actual port name):
esptool.py --chip esp32s3 --port PORT_NAME erase_flash
Alternatively, try the second way to invoke esptool:
python3 -m esptool --chip esp32s3 --port PORT_NAME erase_flash
Examples:
esptool.py --chip esp32s3 --port /dev/tty.usbmodem11101 erase_flash

python3 -m esptool --chip esp32s3 --port /dev/tty.usbmodem11101 erase_flash
The following error may happen if another program on the computer is connected to the device:
A fatal error occurred: Could not open PORT_NAME,
the port is busy or doesn't exist.
([Errno 16] could not open port PORT_NAME: [Errno 16]
Resource busy: PORT_NAME)
In case of the above error, close the Arduino IDE (or any other serial communication software) and run esptool again.
Next step is to flash the FUSION Core Firmware, using the following command (replace PORT_NAME with actual port name):
esptool.py --chip esp32s3 --port PORT_NAME write_flash -z 0 ESP32s3-RIoTClient.bin
Alternatively, try the second way to invoke esptool:
python3 -m esptool --chip esp32s3 --port PORT_NAME write_flash -z 0 ESP32s3-RIoTClient.bin
Examples:
esptool.py --chip esp32s3 --port /dev/tty.usbmodem11101 write_flash -z 0  ESP32s3-RIoTClient.bin

python3 -m esptool --chip esp32s3 --port /dev/tty.usbmodem11101 write_flash -z 0  ESP32s3-RIoTClient.bin
The above flashes the FUSION Core Firmware to the ESP32.
The device will now restart automatically and connect to the network to perform the enrollment.
6. Enrollment Process
When the device restarts, it will connect to the network to complete the enrollment. The enrollment process usually takes around 3-5 minutes.
6.1. View Log Output
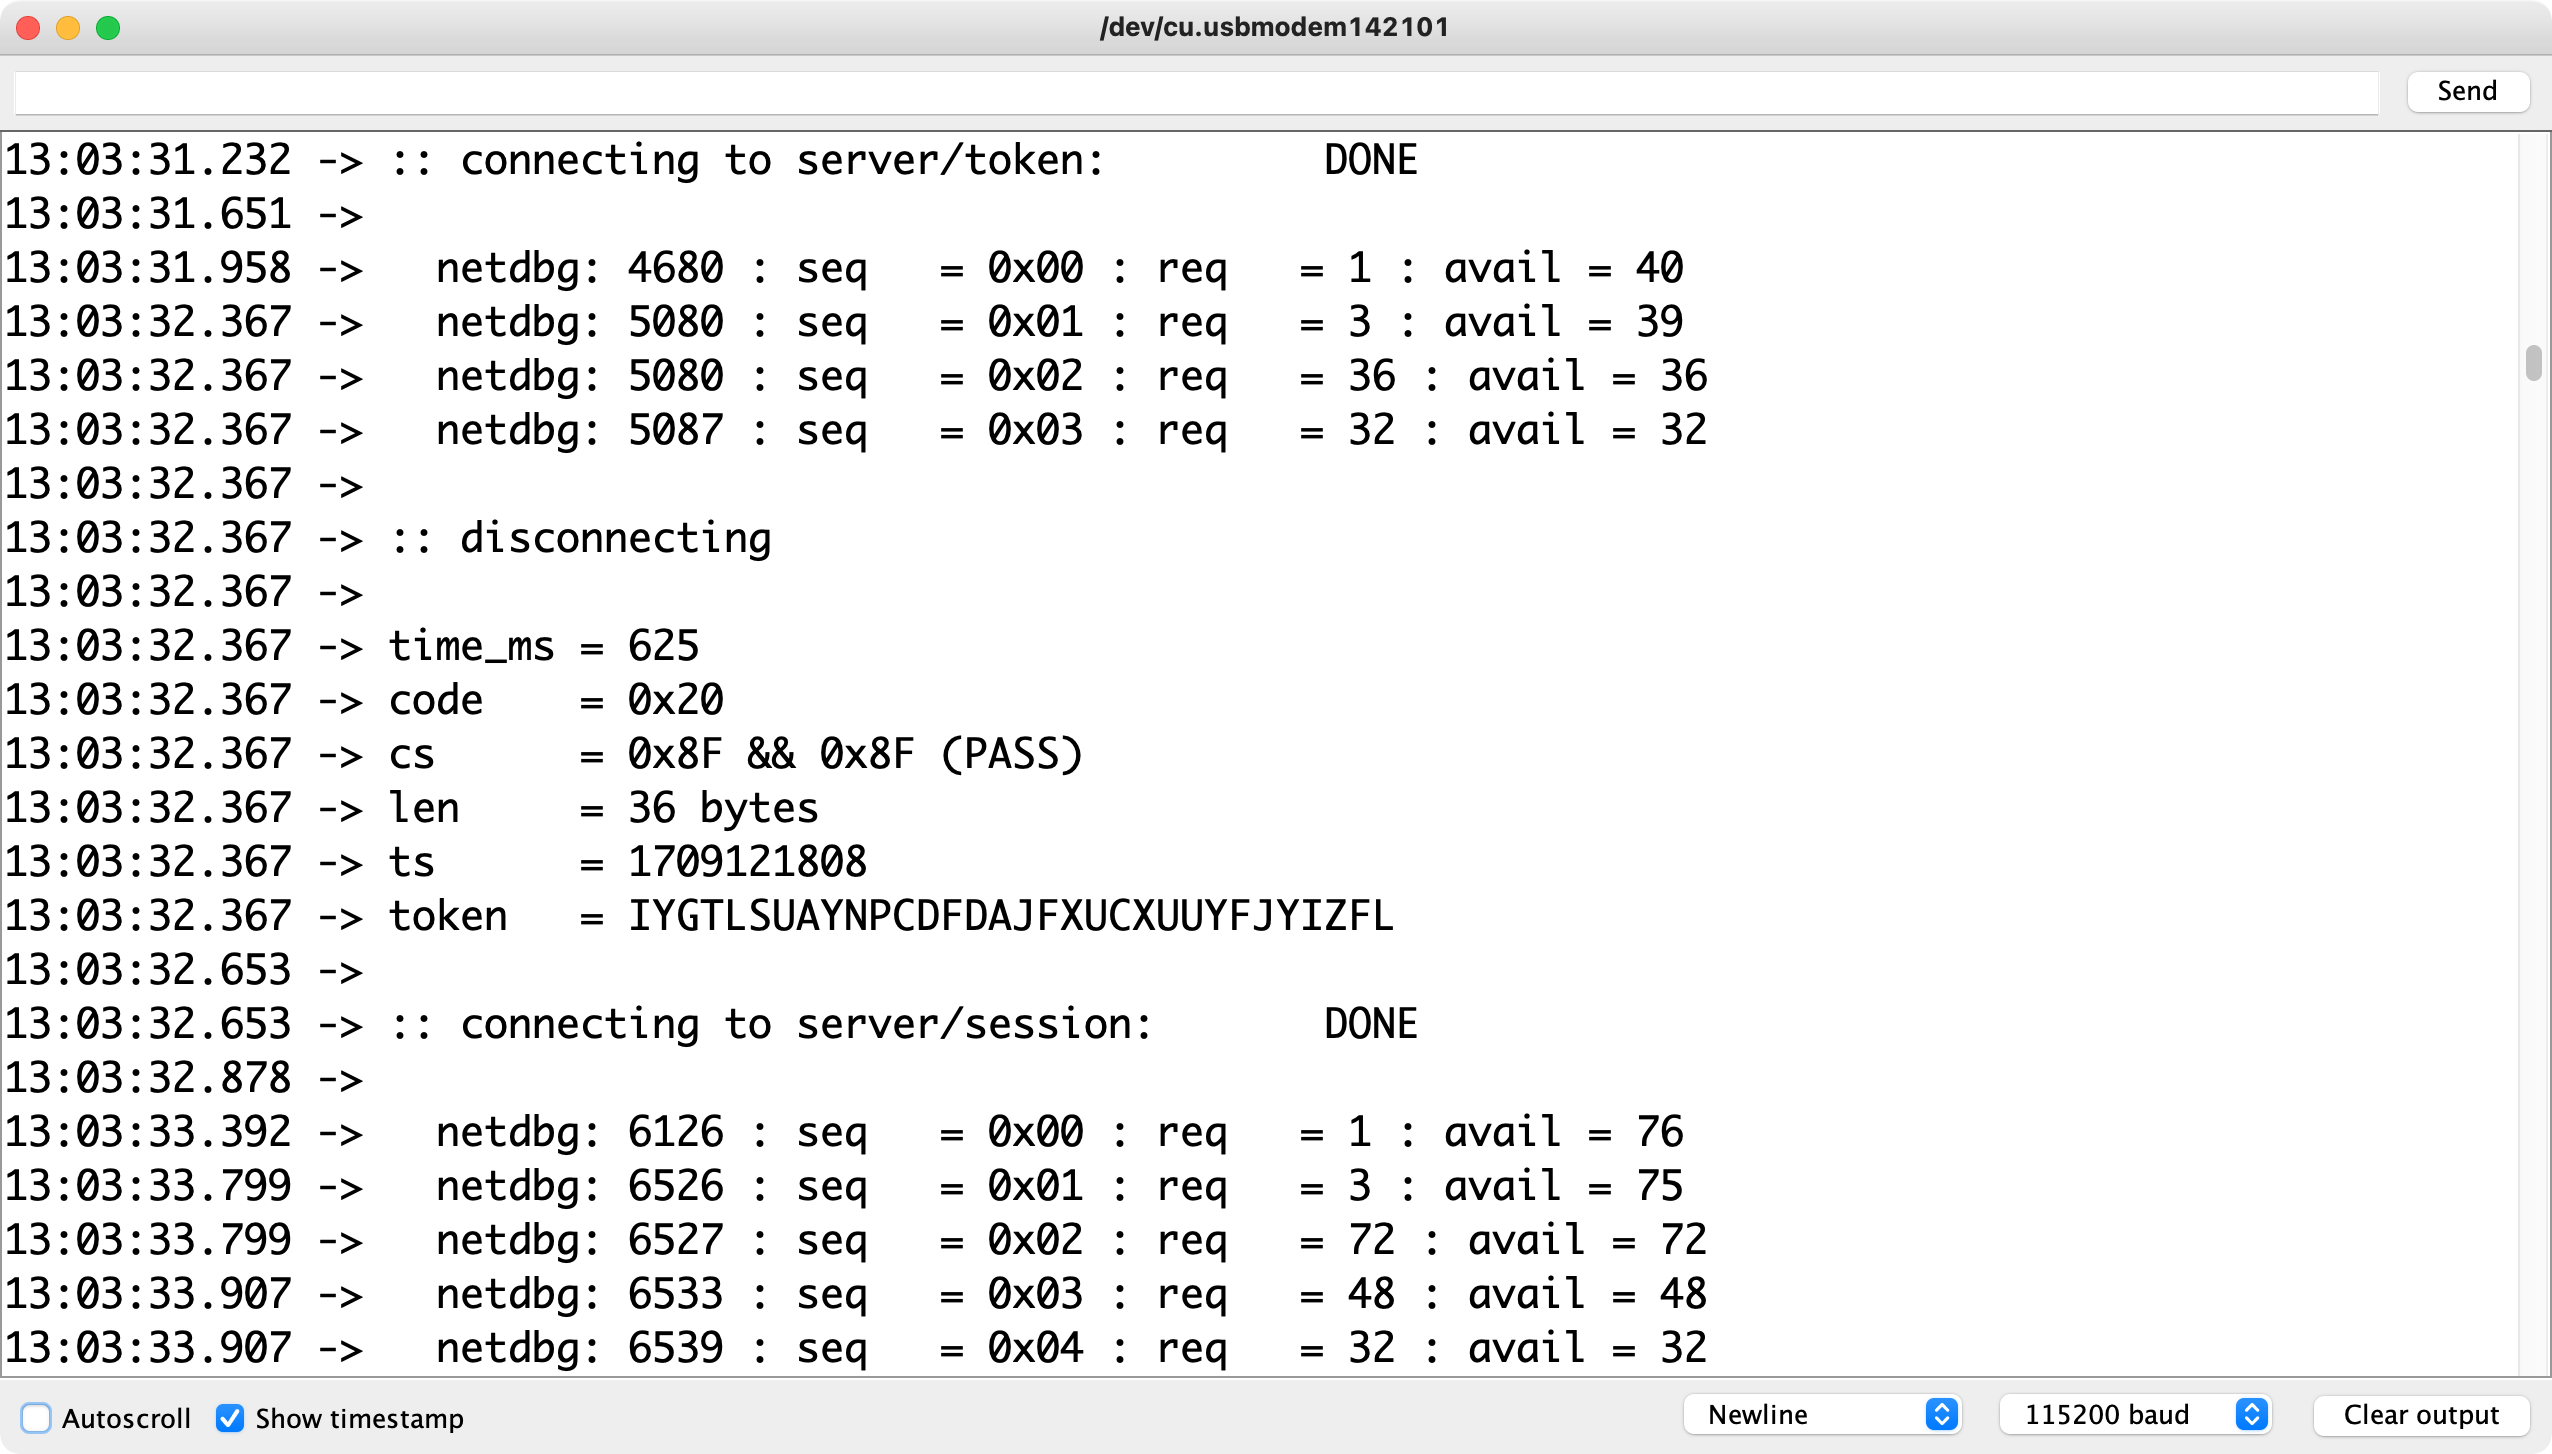
The output from the Core Firmware Log can be viewed in the Serial Monitor in the Arduino IDE (set the baud rate in the Serial Monitor to 115200 baud). The log shows the output that is generated from the ESP32 running the Core Firmware. The log shows the enrollment steps and the communication taking place with the IoT Server.
Note that the enrolment process starts right after the core firmware has been flashed to the device using esptool. This means that the first part of the log may not be visible in the serial monitor. Also note that it is not possible to connect the serial monitor in advance, since esptool needs that connection (only one connection at a time can be made over the serial port).
To learn more about the information shown in the log, visit the Core Firmware Log documentation page.
6.2. Alternative Ways to View Log Output
As an alternative, the log output from the Uno R4 can be viewed in a terminal window. On Windows, PuTTY can be used, and on Linux and macOs, the screen command is available.
Syntax for the screen command:
screen PORT_NAME BAUD_RATE
Example:
screen /dev/tty.usbmodem11101 115200
Exit screen by pressing these keys on the keyboard:
CTRL+A followed by K
7. Verify Device Status
To verify that the device is enrolled, check the device status in the Management Console.
Navigate to the Devices Screen in the Management Console and locate the device - the “Enrolled” column for the device shold display a check mark.
Click on the device to open the detailed device view.
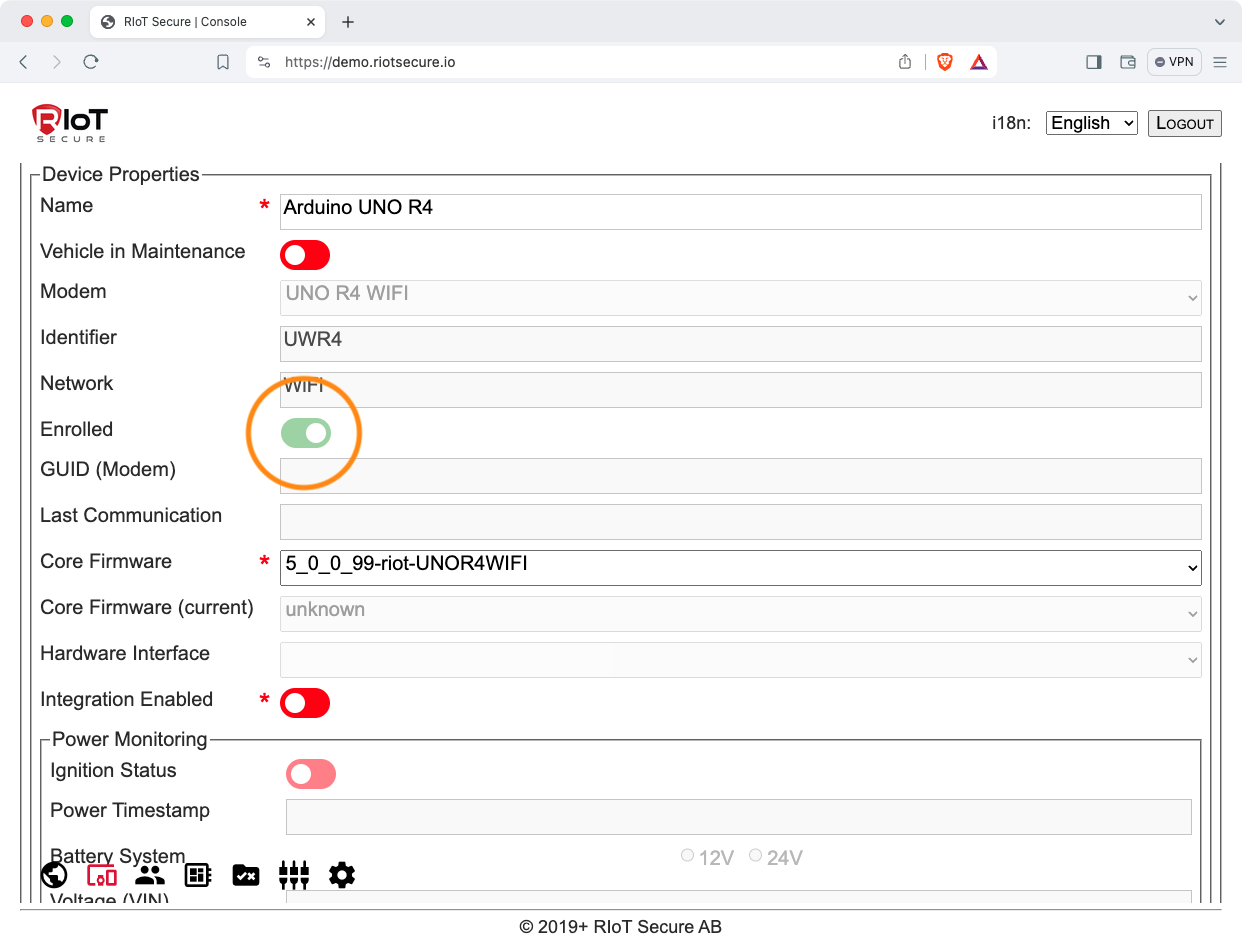
The device should display the “Enrolled” switch in a green color (indicating a successful enrollment), as in the following screenshot (this switch is display only - not clickable).
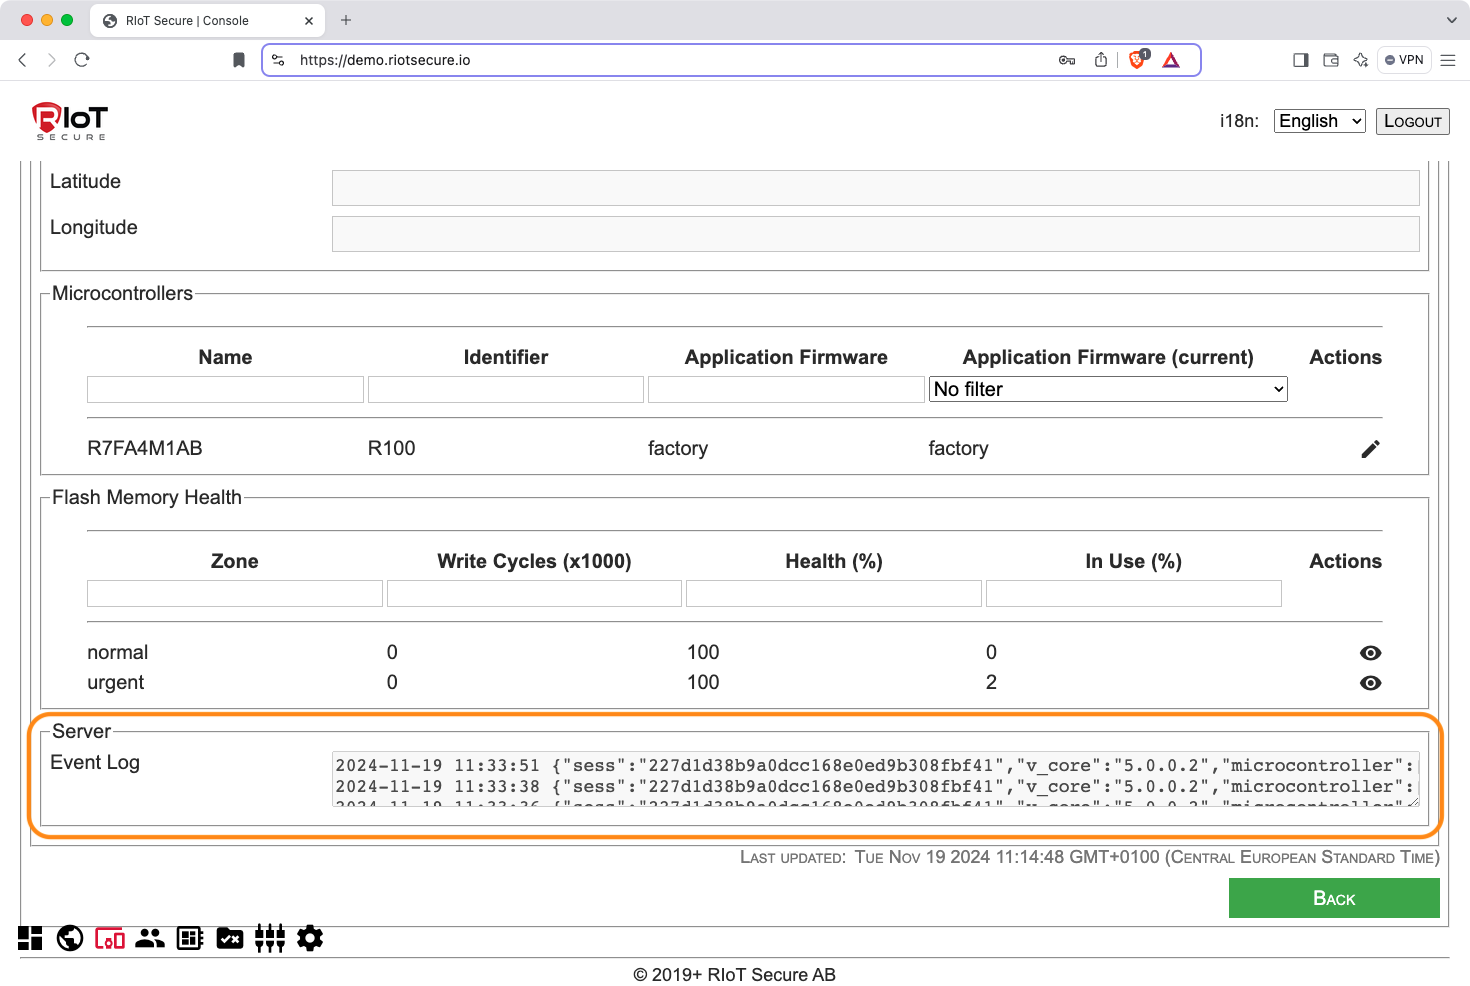
There should be data appearing in the Event Log at the bottom of the device view. Note that the topmost entry is the most recent log entry, with older entries following below. Here is an example of the event log:
The device has now been enrolled with the RIoT Secure Platform and will maintain a connection with the server as long as it is powered on.
If powered off, the device will reconnect when powered on again.
If the device should disconnect from the network, it will still operate and collect data, and reconnect when the network becomes available again.
The enrollment of the device is now complete.
8. Over-the-Air Firmware Updates
When the device has been enrolled, the application firmware can be updated over-the-air. For this step, an application firmware sketch is needed.
Firmware files are exported from the Arduino IDE to hex format and are then uploaded and deployed over-the-air using the Management Console.
The following sections provide an overview of how to do OTA updates. For further details, consult the Firmware Over-the-Air Tutorial.
8.1. Create a Firmware Sketch
The first step is to create a firmware sketch. This is done in the Arduino IDE. For the purpose of this tutorial, it is suggested to use the basic Blink example sketch, which turns the onboard LED on and off.
8.2. Export the Firmware Sketch
The second step is to export the sketch to binary hex format. This is done in the Arduino IDE using the Export Compiled Binary menu command.
If the sketch is named Blink.ino, the exported file for the Arduino Uno R4 WiFi is named:
Blink.ino.hex
For further details on exporting firmware sketches, see the Export Application Firmware reference guide.
8.3. Upload the Firmware File to the Cloud
The third step is to upload the exported firmware file to the RIoT Secure Platform.
Go to the Application Firmwares Screen in the Management Console to create a new application firmware entry and upload the exported hex file.
8.4. Assign the Firmware to the Device
The last step is to assign the new firmware to the device.
Go to the Devices Screen in the Management Console and open the Microcontrollers section, and select the new firmware for the device.
Once this is done, the device will download and update the application firmware next time it connects to the cloud (typically within 60 seconds).
8.5. Visual Guide to OTA Updates
The Arduino Uno R4 Firmware OTA Tutorial provides a visual guide to performing OTA updates.
8.6. Summary of the OTA Update Process
Summary of how to perform OTA updates:
- Create an application sketch in the Arduino IDE.
- Export the sketch to binary hex format (use the menu command “Export Compiled Binary” in the IDE).
- Use the Application Firmwares Screen in the Management Console to create a new application firmware entry and upload the exported hex file.
- Use the Devices Screen in the Management Console to assign the new firmware to the device.
- The device will download and update the application firmware the next time it connects to the cloud (devices typically connect every 60 seconds).