Arduino Uno and Arduino Mega Firmware OTA Tutorial
1. Introduction
This tutorial shows how to update the application firmware for an IoT device over-the-air.
The tutorial has examples for the following application boards:
- Arduino Uno
- Arduino Mega
1.1. Overview
Application firmware is written and compiled in the Arduino IDE. The Management Console is then used to upload the firmware to the physical device.
Overview of how to create and upload application firmware:
- Write an application firmware sketch (Arduino IDE)
- Export the firmware sketch to binary format (Arduino IDE)
- Create a new firmware entry and upload the exported sketch to the OASIS Cloud (Management Console)
- Edit the device to assign the new firmware (Management Console)
- Next time the physical device connects to the OASIS Cloud, the new application firmware will be download and installed on the device (a device typically connects every 60 seconds)
Each of the above steps is described below.
1.2. Prerequisites
The following is needed for this tutorial:
- An account for logging into the Management Console.
- A device enrolled with the RIoT Secure Platform.
- A computer with the Ardino IDE installed.
- Basic knowledge of the Ardino IDE.
- Arduino IDE version 2.3.2 or later is needed to build application firmwares.
2. Step-By-Step Instructions
2.1. Create an Application Firmware Sketch
The Arduino IDE is used to create an application sketch that will run on the device.
Sketch for Arduino Uno or Arduino Mega
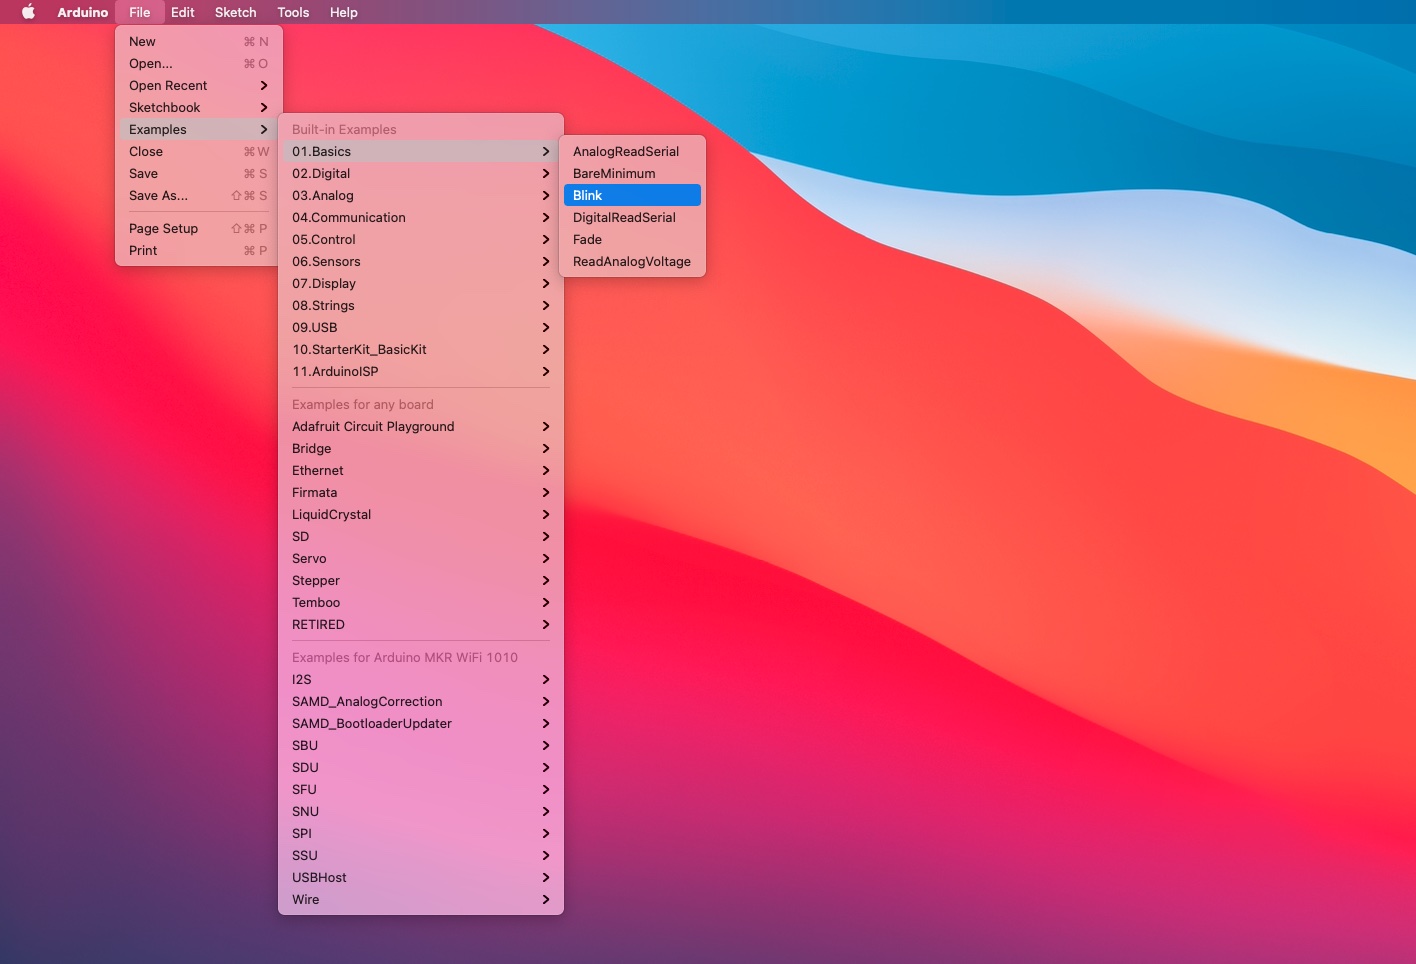
If you don’t have a sketch ready at hand, you can use the “Blink” example sketch that is available in the IDE.
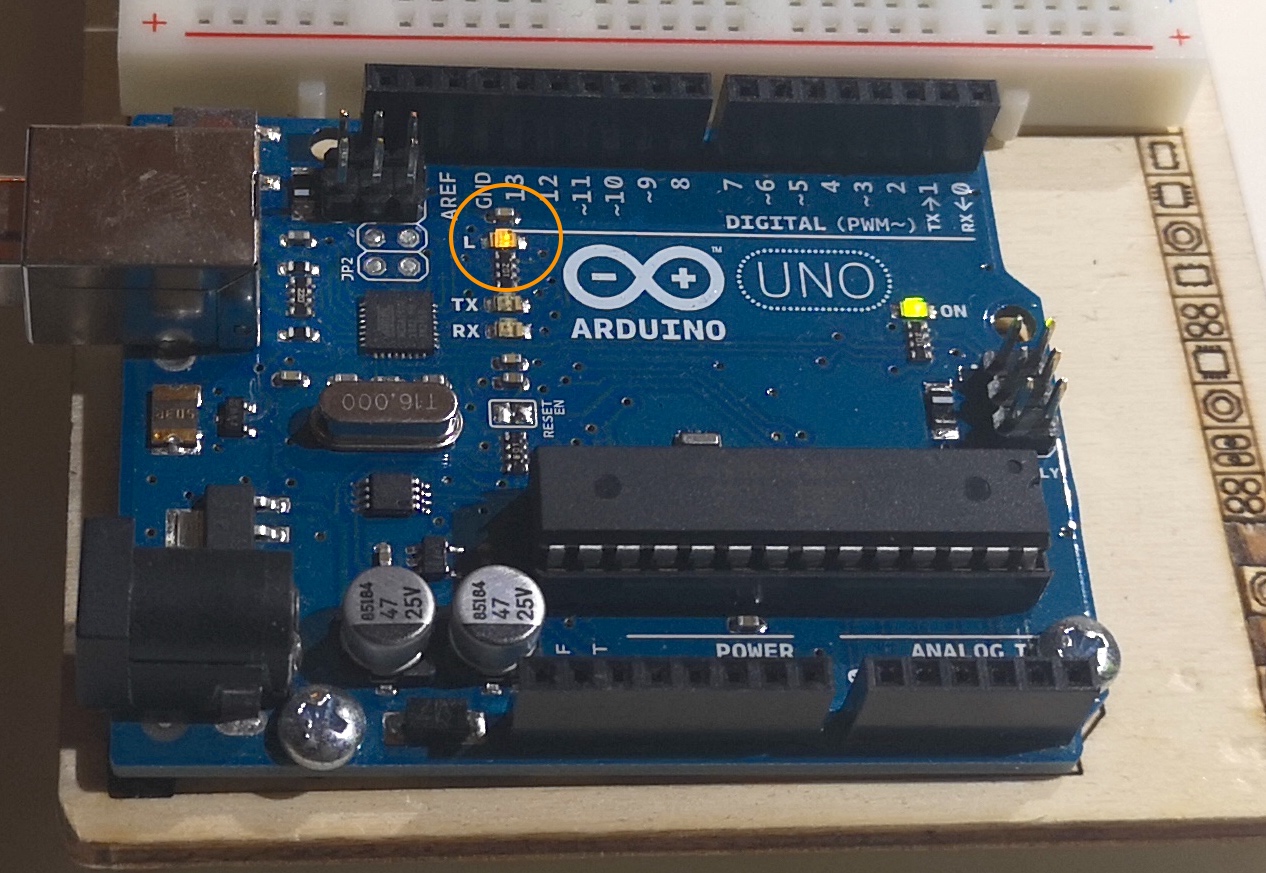
This sketch blinks the small orange LED on the Arduino Uno or the Arduino Mega. (The RIoT FUSION Shield and MKR modem have been removed in this photo for visibility; the device must be assembled when in operation).
The following photo shows the LED on the Arduino Uno:
Create the sketch by following these steps:
-
Open the Arduino IDE.
-
Select the Blink example sketch from the File→Examples→Basics menu.
-
Save the sketch and name it Blink. By default, the sketch will be saved in the Documents/Arduino folder.
2.2. Export the Compiled Sketch
In this step the sketch is compiled and exported to a binary hex format. This will produce a file that can be uploaded to the OASIS Cloud using the Management Console.
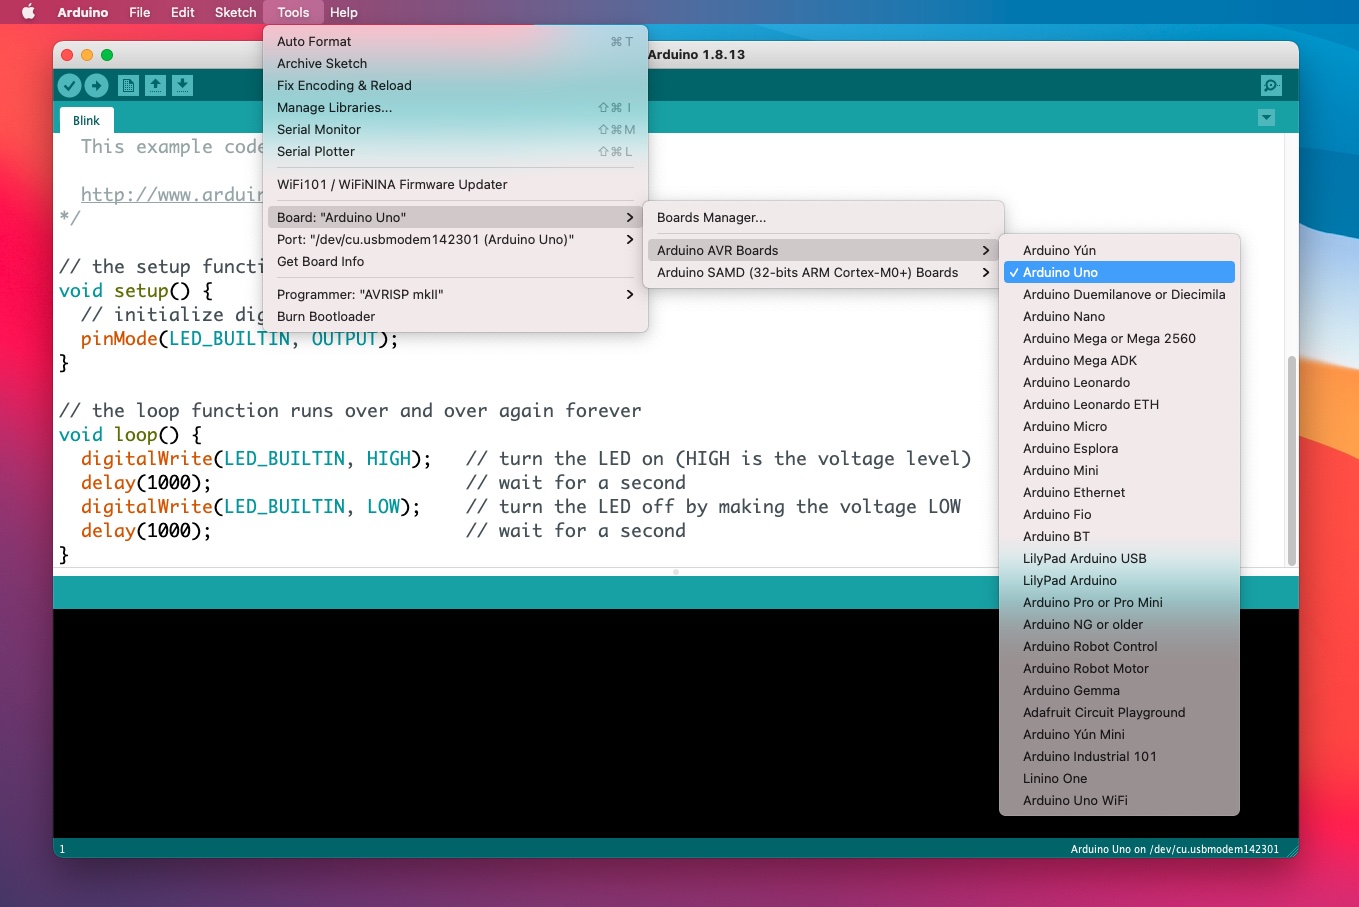
2.2.1. Select the Board
Select the application board in the Tools→Board menu.
For the Arduino Uno, select:
Tools→Board→Arduino AVR Boards→Arduino Uno
For the Arduino Mega, select:
Tools→Board→Arduino AVR Boards→Arduino Mega
Example of the menu in the IDE used to select the board:
2.2.2. Export the Sketch
Then compile and export the sketch, by selecting the menu command Sketch→Export Compiled Binary.
This will compile the program and create a .hex file in the application folder for the sketch.
2.2.3. Locate the Exported Sketch
Several files will be created in the application folder. It is the one without bootloader that is used with the RIoT Secure Platform.
For the Arduino Uno, this file will be named:
build/arduino.avr.uno/Blink.ino.hex
For the Arduino Mega, this file will be named:
build/arduino.avr.mega/Blink.ino.hex
This file will be uploaded to the OASIS Cloud in the next step.
2.3. Upload the Firmware File to the OASIS Cloud
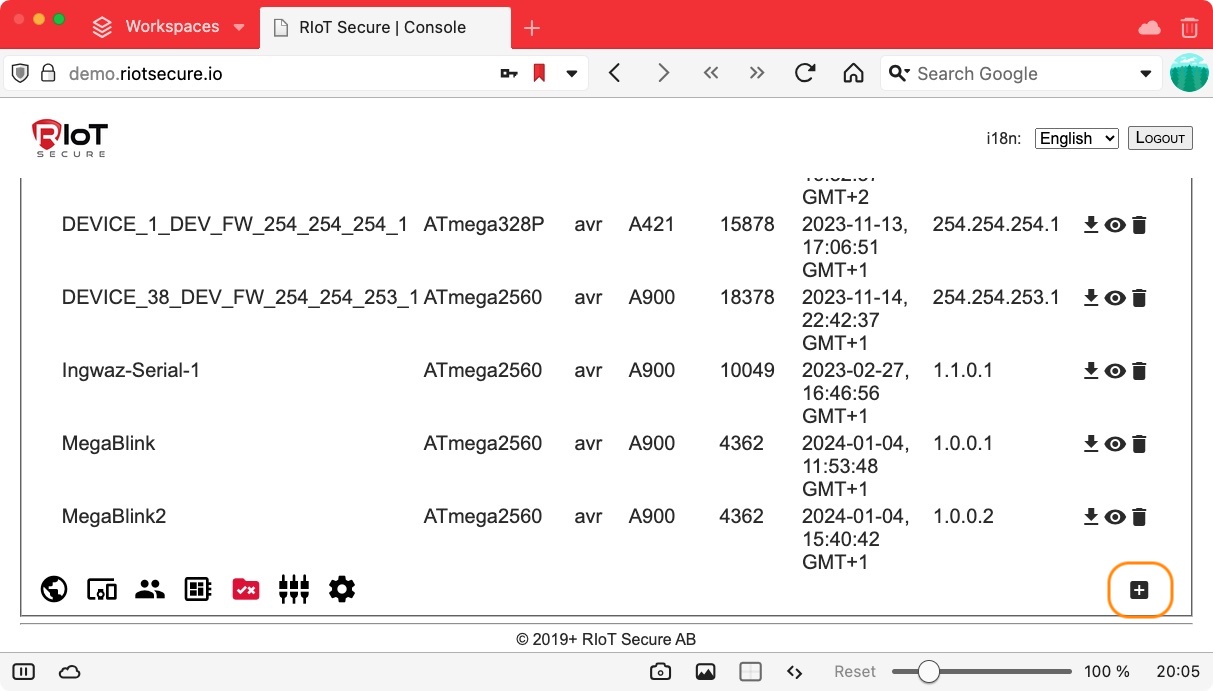
Exported application firmware files are uploaded on the Application Firmwares Screen in the Management Console.
2.3.1. Create a New Firmware Entry
Create a new firmware entry by clicking on the “+” icon:
A form for the new entry will be presented:
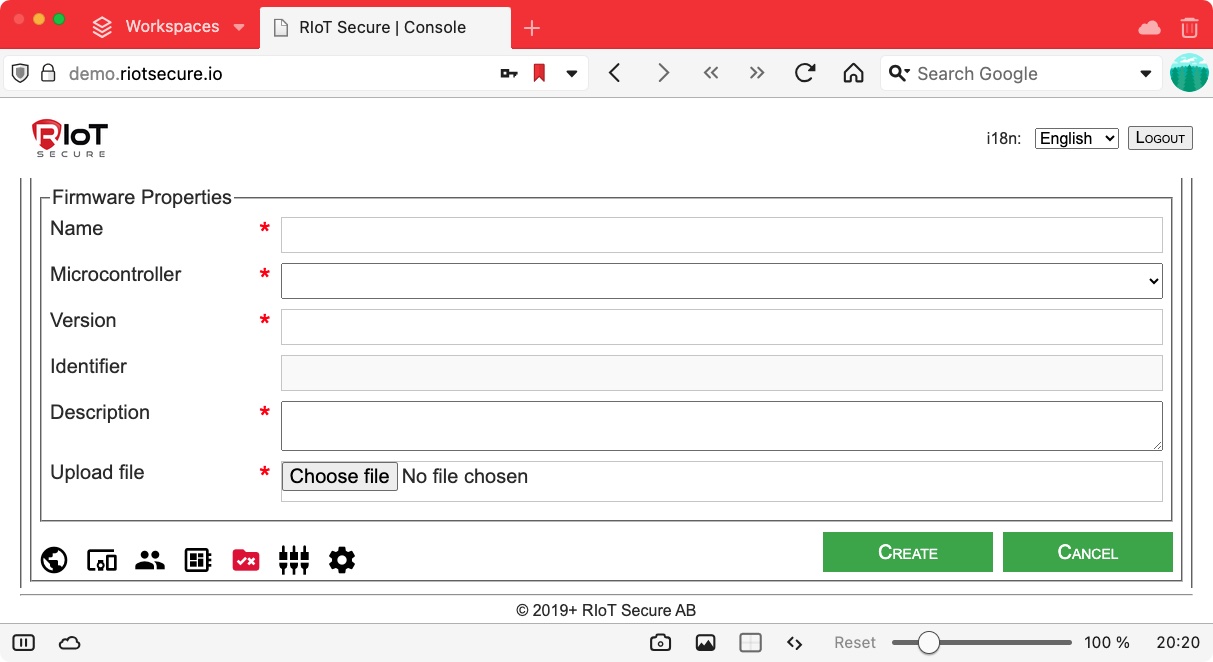
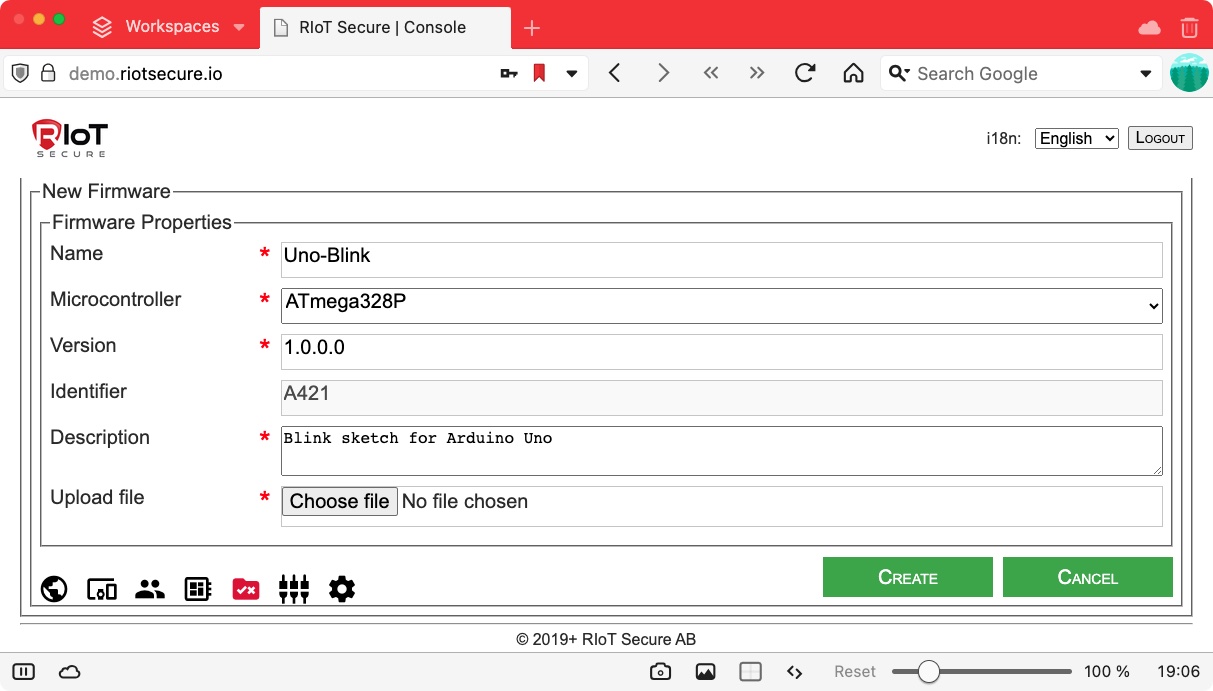
2.3.2. Fill In the Form Fields
Fill in the form fields as follows:
| Field | Purpose |
|---|---|
| Name | Type the firmware name (must not contains spaces) |
| Microcontroller |
Select ATmega328P for Arduino Uno Select ATmega2560 for Arduino Mega |
| Version | Specify unique version number with the format N.N.N.N, where N is a number between 0 and 255 (0.0.0.0 and 255.255.255.255 are reserved by the system and may not be used) |
| Identifier | Internal identifier filled in automatically when the mircocontroller is selected |
| Description | Write a user readable description of the firmware |
| Upload File | Select the firmware file to upload |
This is an example of form field values for an Arduino Uno firmware:
This is an example of form field values for an Arduino Mega firmware:

2.3.3. Upload the Exported Firmware File
Click on Choose file to select the firmware file to upload.
Example for Arduino Uno (same procedure for other boards):
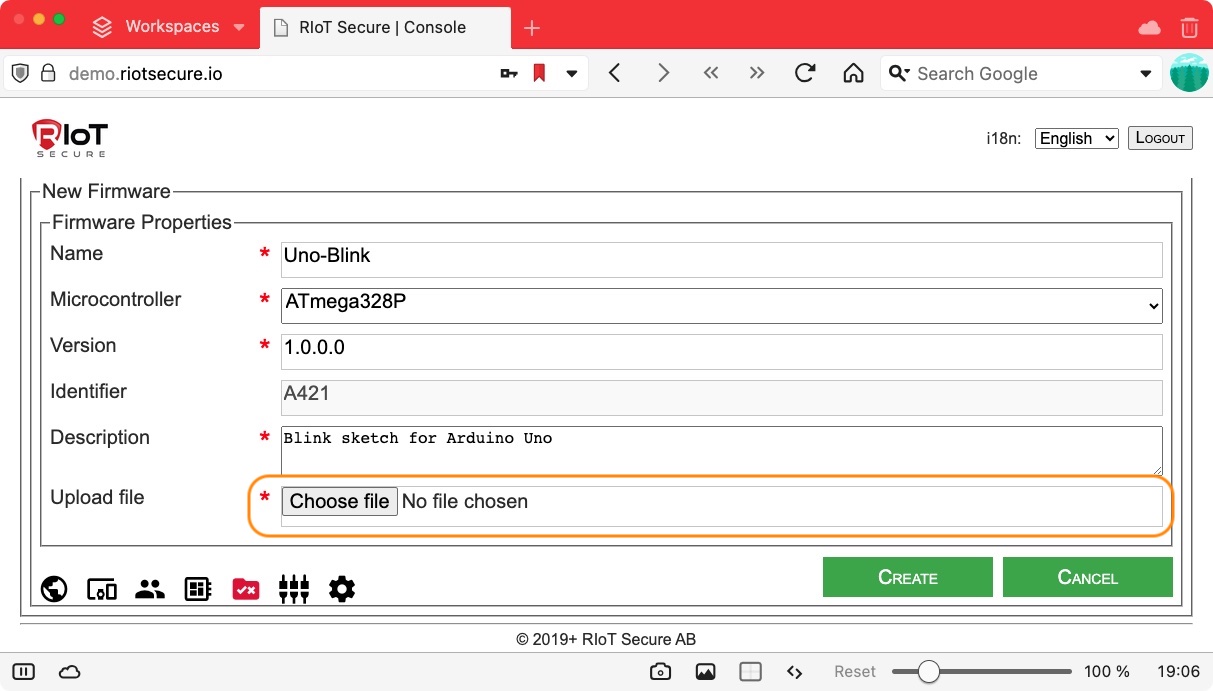
The firmware file is the file exported from the Arduino IDE.
If the application sketch is named Blink.ino, the exported file is found in the Documents/Arduino/Blink folder on the computer.
For the Arduino Uno, the file is named:
build/arduino.avr.uno/Blink.ino.hex
For the Arduino Mega, the file is named:
build/arduino.avr.mega/Blink.ino.hex
2.3.4. Save the Firmware Entry
When the form is complete, click on the Create button to save the firmware entry.
Example for Arduino Uno (same procedure for other boards):

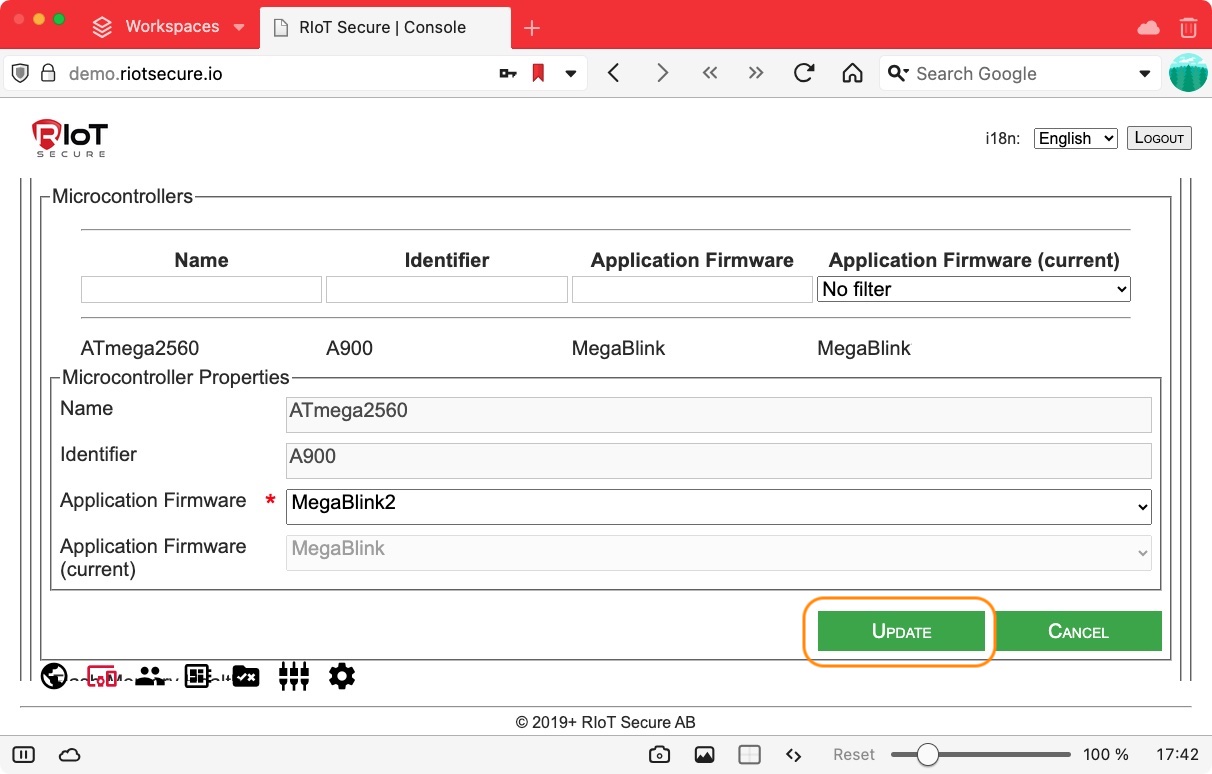
2.4. Assign the New Firmware to the Device
The final step is to assign the new firmware to the device. This is done on the Devices Screen in the Management Console.
Follow these steps to assign the new application firmware to the device:
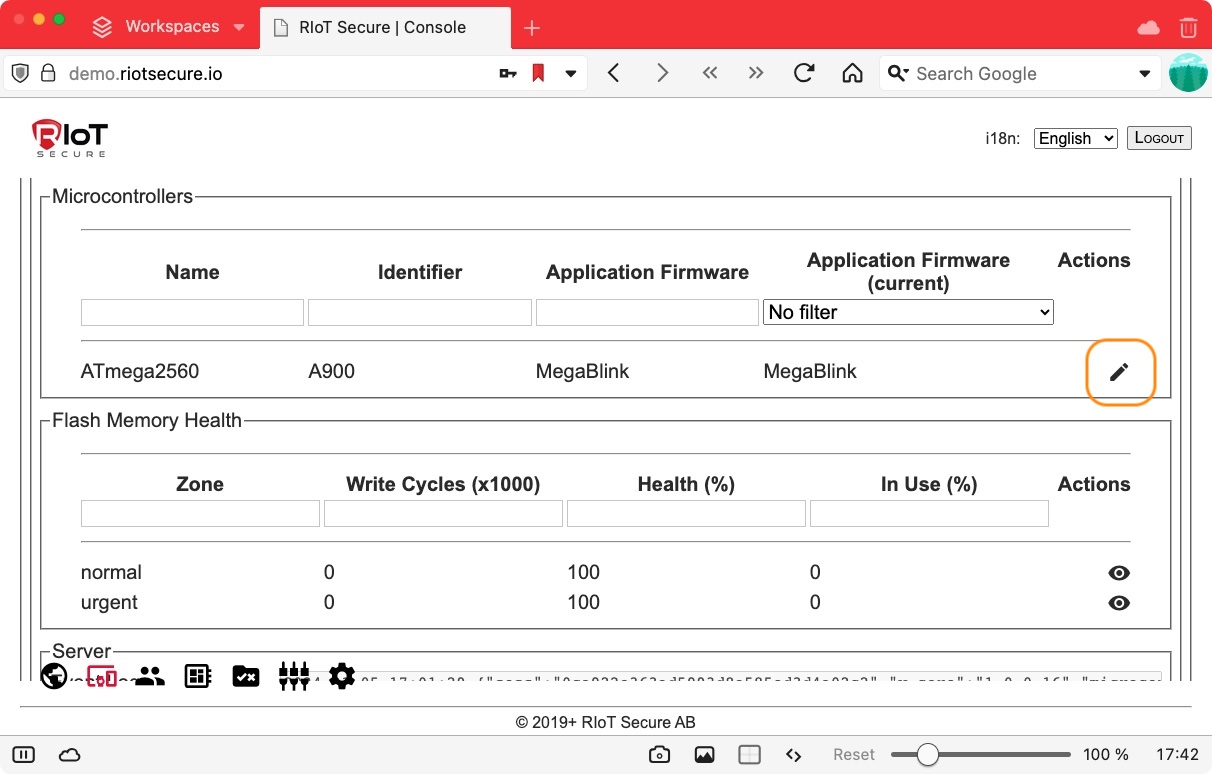
- Navigate to the Devices Screen and locate the device that should be updated in the device list.
- Click on the device in the list to open the edit form.
- Locate to the Microcontrollers section.
- Click the “pencil” icon to open the microcontroller subform (a device can have up to four microcontrollers, but the common case is one microcontroller).
- Select the desired application firmware from the popup menu.
- Click the Update button to save the change.
The application firmware update will take place the next time the device connects to the server (ususally within 1 minute).
If the Blink example sketch is used, you shuld see the LED blinking within a minute or two.
The following sequence of screenshots shows an example for the Arduino Mega (the procedure is the same for other boards):

3. Firmware Version Numbers
The application firmware can be updated at any time.
Experiment by modifying the application sketch in the Arduino IDE, export it, and upload it using the Management Console.
You can for example change the blink pattern to produce a different visual result.
Note that the new firmware entry must have a new name and a new version number.
The name and version number from the previous firmware entry cannot be reused, unless that entry is deleted (note that firmwares in use cannot be deleted).
For example, if the first application firmware has the version number:
1.0.0.0
The next entry can use:
1.0.0.1
And so on.
This concludes the application firmware over-the-air tutorial.
4. Command-Line Tools
Advanced developers can use the RIoT Secure REST API to automate the above process.
The [REST API Tools] section has further information about Firmware OTA command-line tools.